Share a work item
Create a public link to one work item, so people without a Jira account can read it in their browser. You choose which sections and fields the link shows.
Before you begin
- Jira permission: you can see the work item in Jira.
- App permission: your Jira admin lets you share work items under Work Item Share Permissions, and the work item's space can be shared. Both are on by default. See Sharing policy settings.
Choose what viewers see
-
Open the work item, select Actions (⋯) in the top-right corner, then select Share Public Link. The Share work item window opens.
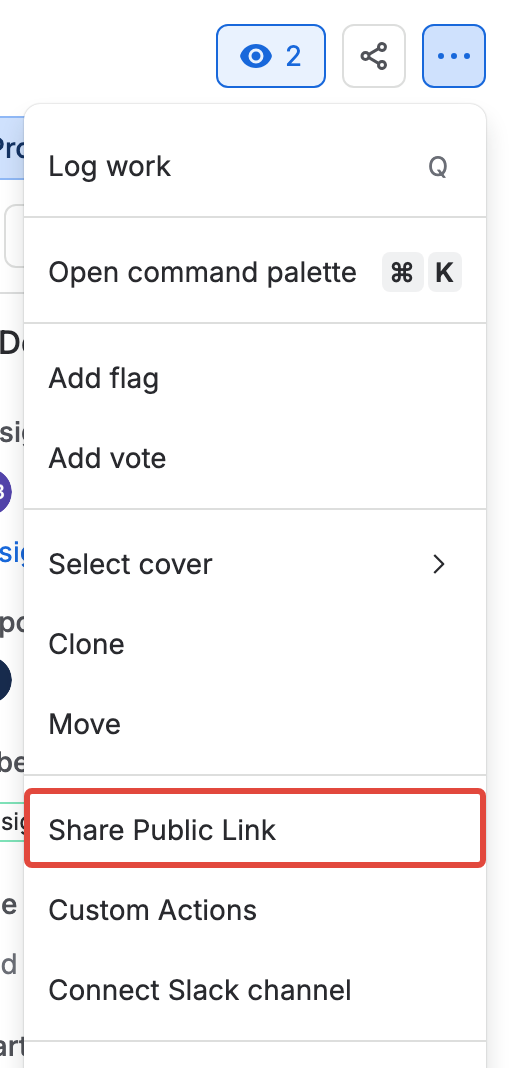
If the work item already has links, the window opens on its list of links. Select New link.
-
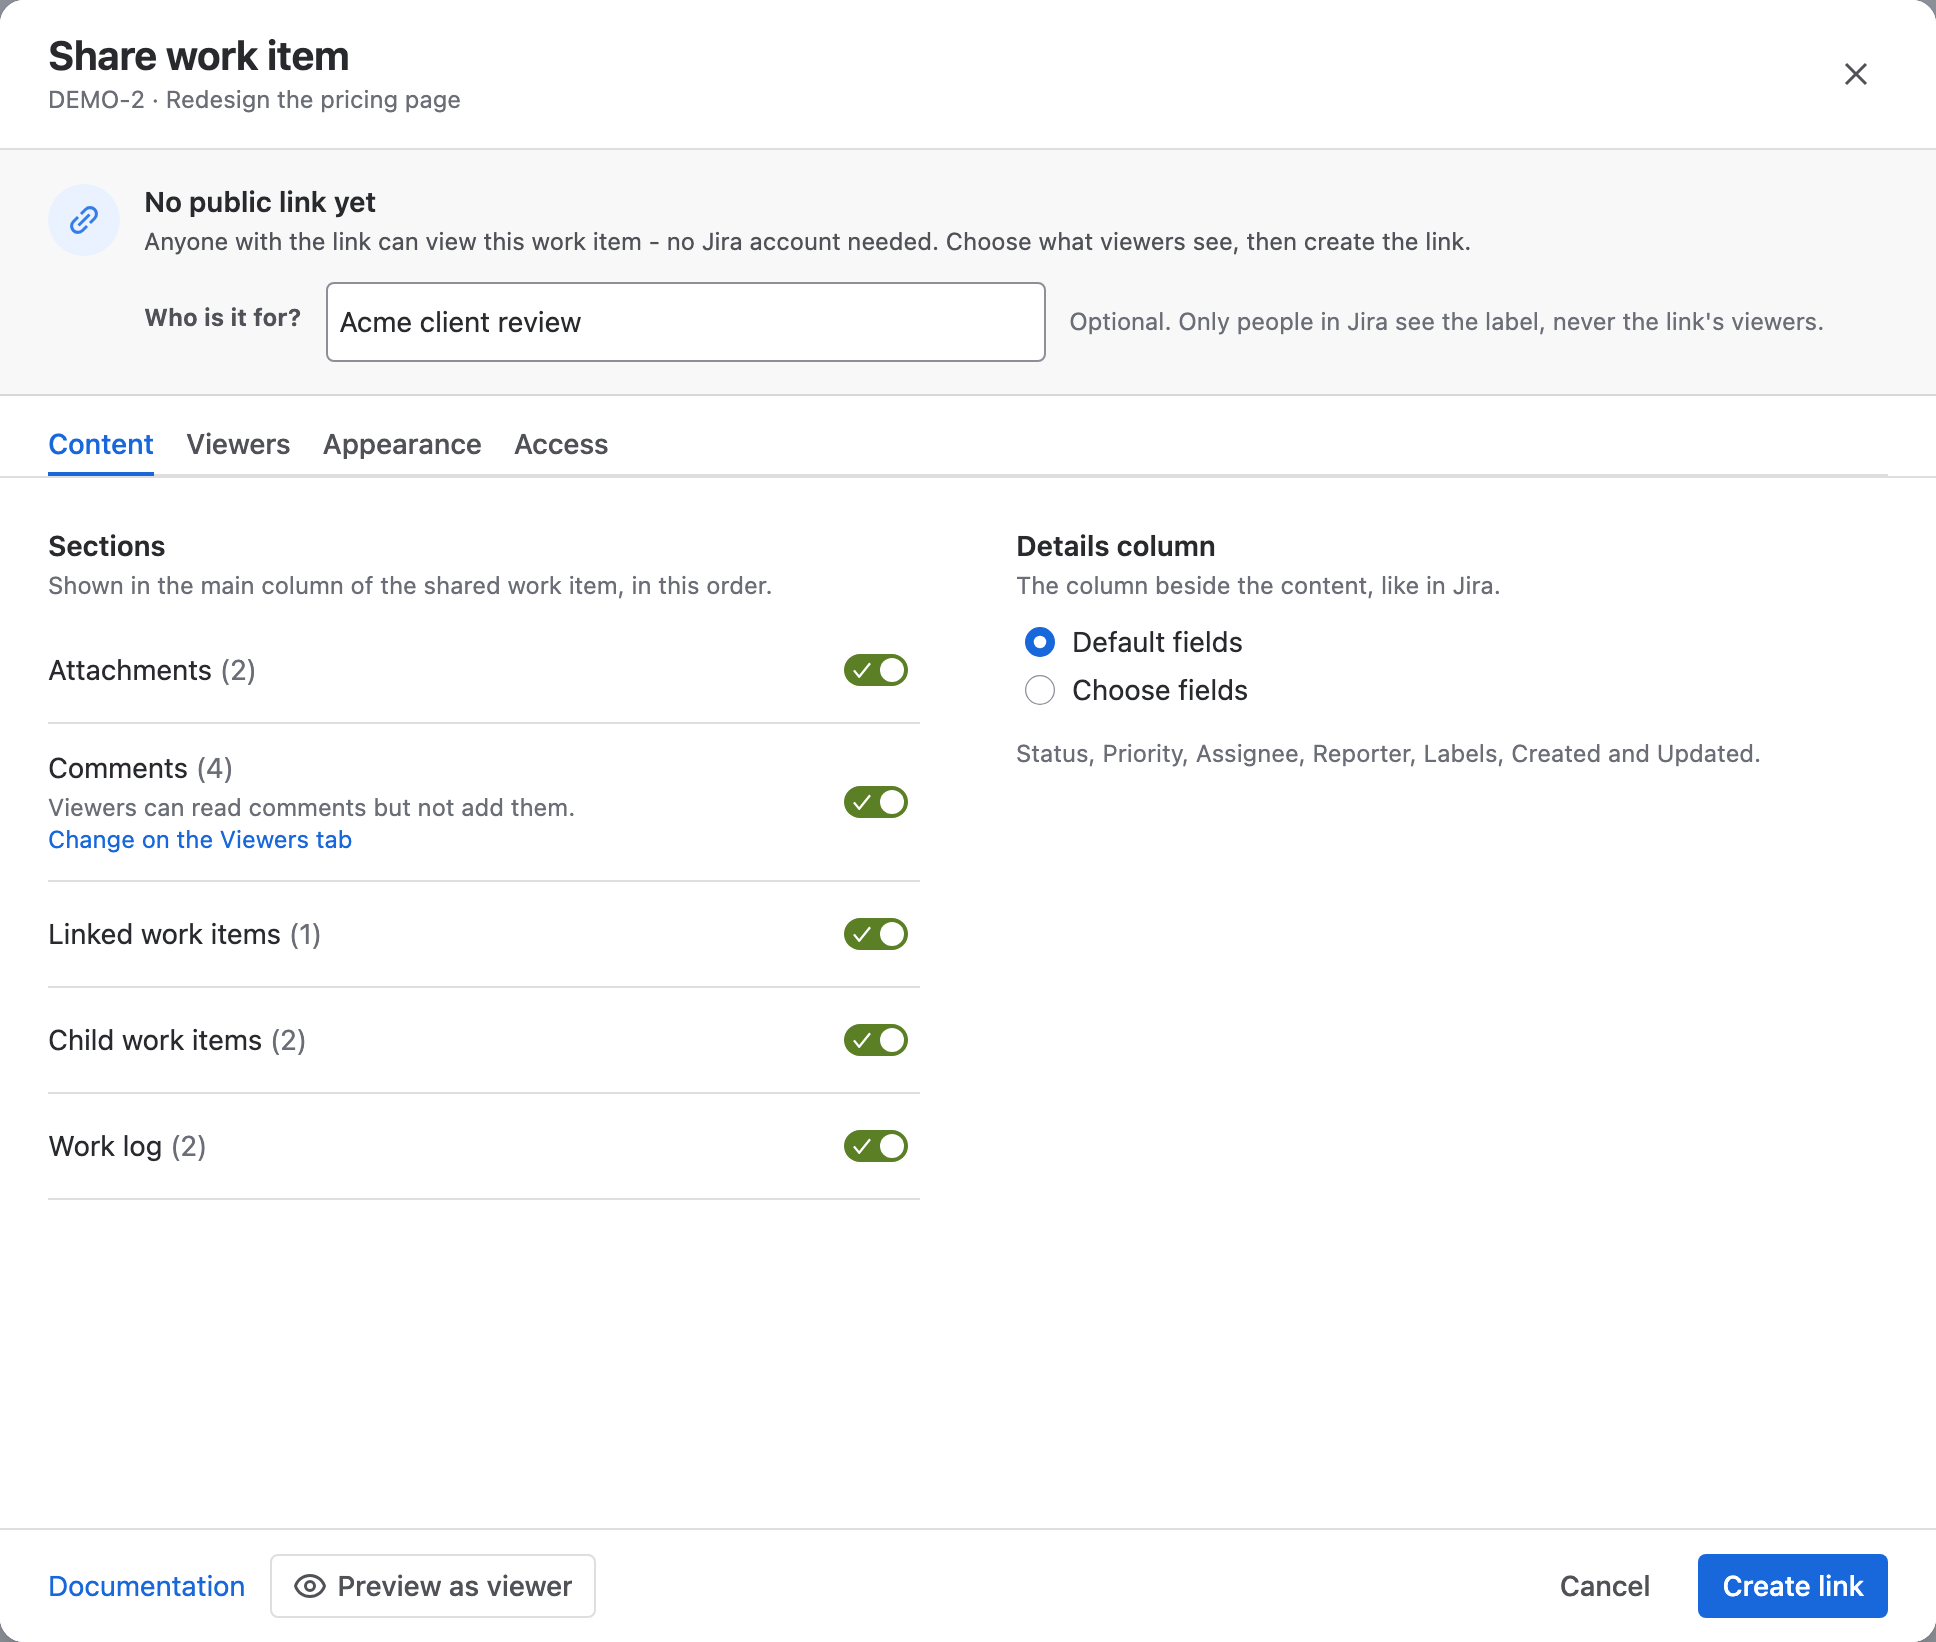
Optional: in Who is it for?, enter a label such as
Acme client. Only people in Jira see the label, never the link's viewers. -
On the Content tab, under Sections, turn on each section viewers should see. Each one shows how much it holds, for example Attachments (2).
-
Optional: under Details column, select Choose fields and pick the fields to show beside the content, in the order you want them.
The summary, description and status are always shown. The details column shows Status, Priority, Assignee, Reporter, Labels, Created and Updated unless you choose your own fields.
| Section | What viewers get |
|---|---|
| Attachments | The work item's files. Viewers can download files up to 3.5 MB each, and images open in the page |
| Comments | Comments on the work item, except internal comments and comments restricted to a role or group |
| Linked work items | Linked work items, grouped by link type, for example "is blocked by" |
| Child work items | Sub-tasks, and the children of an epic or any other parent, with a progress bar. Up to 50 |
| Work log | The newest 100 work log entries, except entries restricted to a role or group |
When something won't reach viewers, a warning appears next to the section it's about. For example, it names files that are too large to download or comments that won't be shown.
Create and send the link
-
Optional: set up the other tabs.
- Viewers: let viewers comment. See Let viewers comment.
- Appearance: pick a theme and an accent color. See Choose a theme and accent color.
- Access: add a password or an expiry date. See Protect a link with a password and Set when a link expires.
-
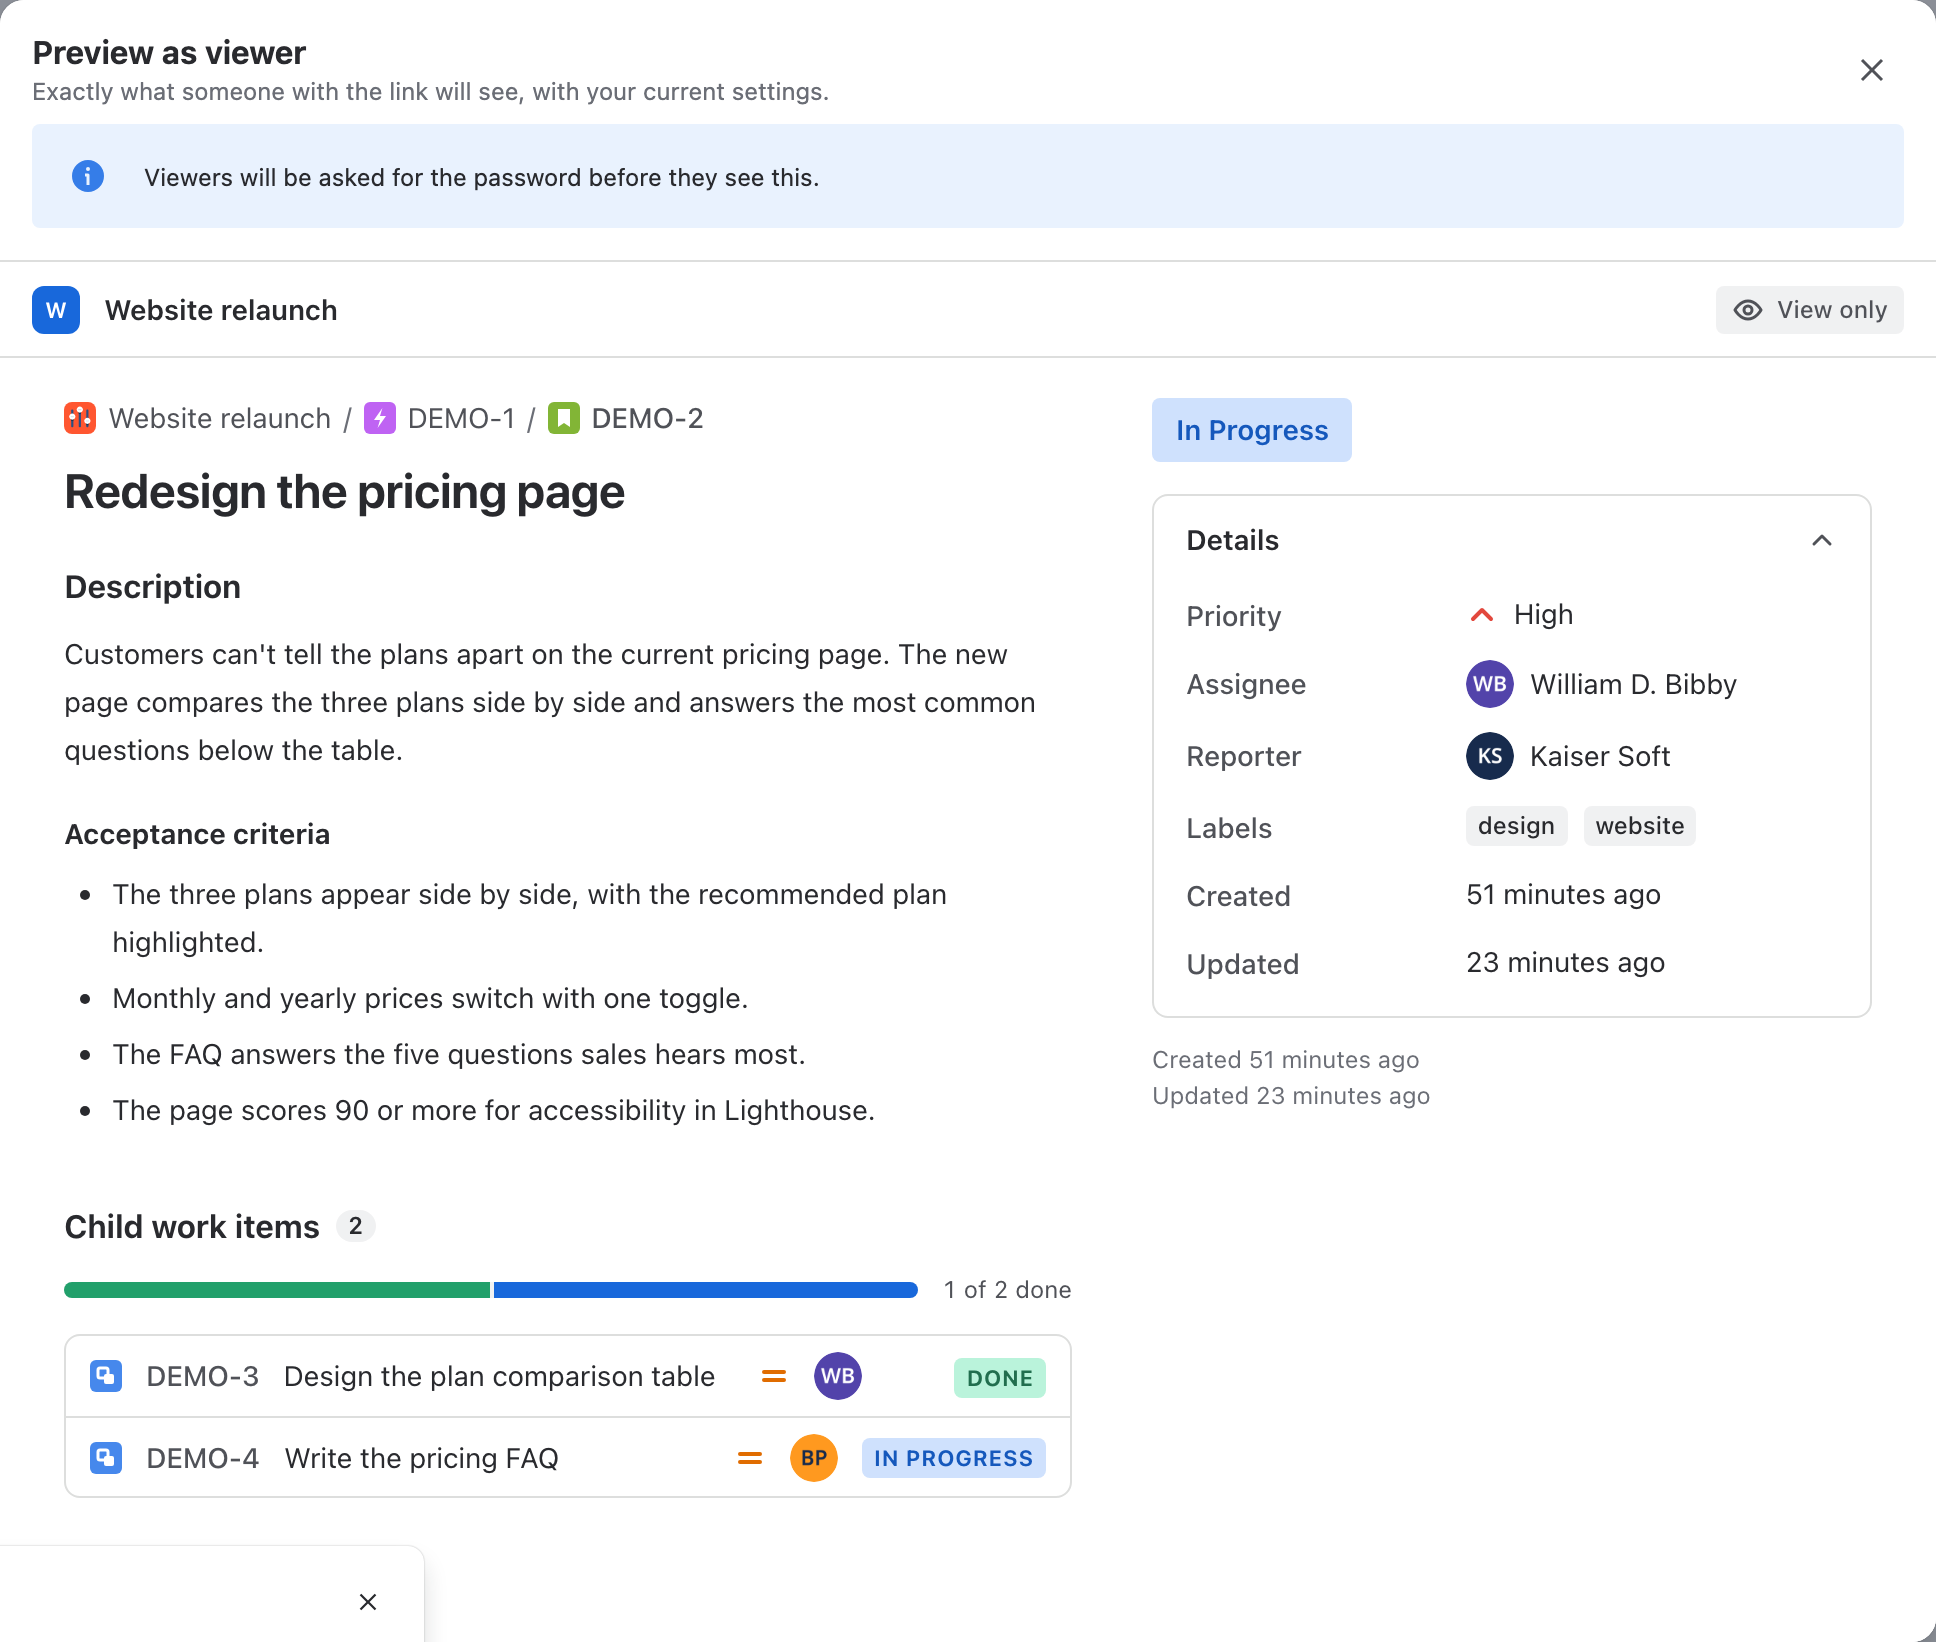
Select Preview as viewer to see the page exactly as viewers will, with your current settings. Close the preview to return to your settings.
-
Select Create link. The link bar shows Public link is on and the link's URL.

-
Select Copy link and send the link to the people who need it.
warningAnyone who has the link can open it, including people it was forwarded to. Add a password or an expiry date when the work item holds anything sensitive.
Result: Viewers open the link in any browser and see the work item without signing in. Every change you save to the link's settings shows the next time a viewer loads the page.
Related
- What viewers see: the shared work item page, section by section.
- Give each audience its own link: up to 10 links per work item, each with its own settings.
- Turn off or replace a link: stop a link working, or give it a new URL.
- A section doesn't appear on a shared link: what to check when viewers miss a section.