Get started with Event Planner
In about 5 minutes you'll install Event Planner and plan your first events on a Confluence page or a Jira work item.
Before you begin
- To install the app, you need to be a site admin, or a Confluence admin or Jira admin. If you aren't one, ask your admin to install it, then start at Add your first calendar.
- To add a calendar, you need permission to edit the Confluence page, or the Edit work items permission in the Jira space.
Install the app
The Confluence and Jira apps are separate Marketplace listings. Install the one for each product you use:
- In Confluence or Jira, select Apps > Explore more apps.
- Search for Event Planner, then select the Apportunity app for your product.
- Select Get app (or Try it free) and follow the prompts.
When the installation finishes, the app works for everyone on the site. There's nothing to configure.
Add your first calendar
- Confluence
- Jira
-
Open a page and select Edit.
-
Type
/event plannerand select Event Planner.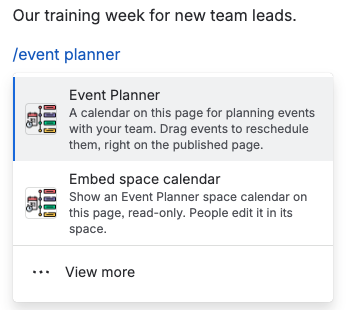
-
Publish the page. The calendar is ready once the page is published.
-
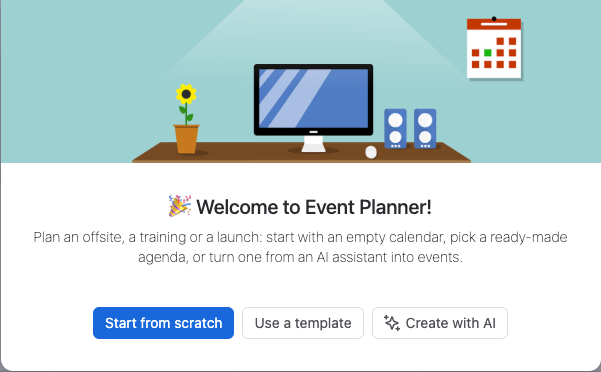
On the published page, the calendar opens with Welcome to Event Planner!. Select Start from scratch.
-
Select New event, type a title, set the start and end, and select Save.
-
Open a work item.
-
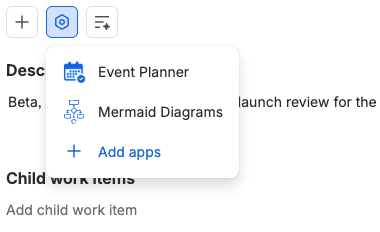
Under the summary, select View app actions (the apps icon) > Event Planner. The Event Planner panel is added to the work item.
-
In the panel, the calendar opens with Welcome to Event Planner!. Select Start from scratch.
-
Select New event, type a title, set the start and end, and select Save.
What to try next
- Drag an event to another time or day, or drag its bottom edge to make it longer. See Move and resize events.
- Add a location, a video call or people to an event. See Event details.
- Fill a calendar in one go from a template or with an AI assistant. See Start from a template and Create with AI.
- Share a calendar with a whole Confluence space. See Space calendars.
- Put a calendar on a Jira dashboard. See Add a calendar to a dashboard.
Related
- Use cases: step-by-step plans for an offsite, a launch, a team calendar and a dashboard.
- Calendars: every place you can put a calendar, and how they differ.
- Permissions: who can see and change each calendar.