Event Planner for Jira
Event Planner for Jira provides two independent ways to manage event calendars in Jira Cloud:
- Issue Panel — An event calendar embedded directly inside a Jira work item. Events are scoped to that specific issue.
- Dashboard Gadget — A standalone event calendar on a Jira Dashboard, completely independent from any individual issue.
The Issue Panel and Dashboard Gadget maintain separate, independent event stores. Events created in an Issue Panel are not visible in a Dashboard Gadget, and vice versa.
Permissions
| Action | Required permission |
|---|---|
| Install the app | Jira Administrator |
| Create, edit, or delete events on an Issue Panel | Work item edit permission |
| View events on an Issue Panel | Any user with issue view permission |
| Create, edit, or delete events on a Dashboard Gadget | Dashboard owner or editor permission |
| View events on a Dashboard Gadget | Any user with access to the dashboard |
All users with work item edit permission can create, edit, and delete any event on that issue's calendar — regardless of who created it. There is no per-event ownership or authorship lock.
Issue Panel — Quick Start
The Issue Panel appears directly within a Jira work item and stores events scoped to that specific issue.
- Open a Jira issue.
- Find the Event Planner panel in the issue view (location depends on your project's panel layout).
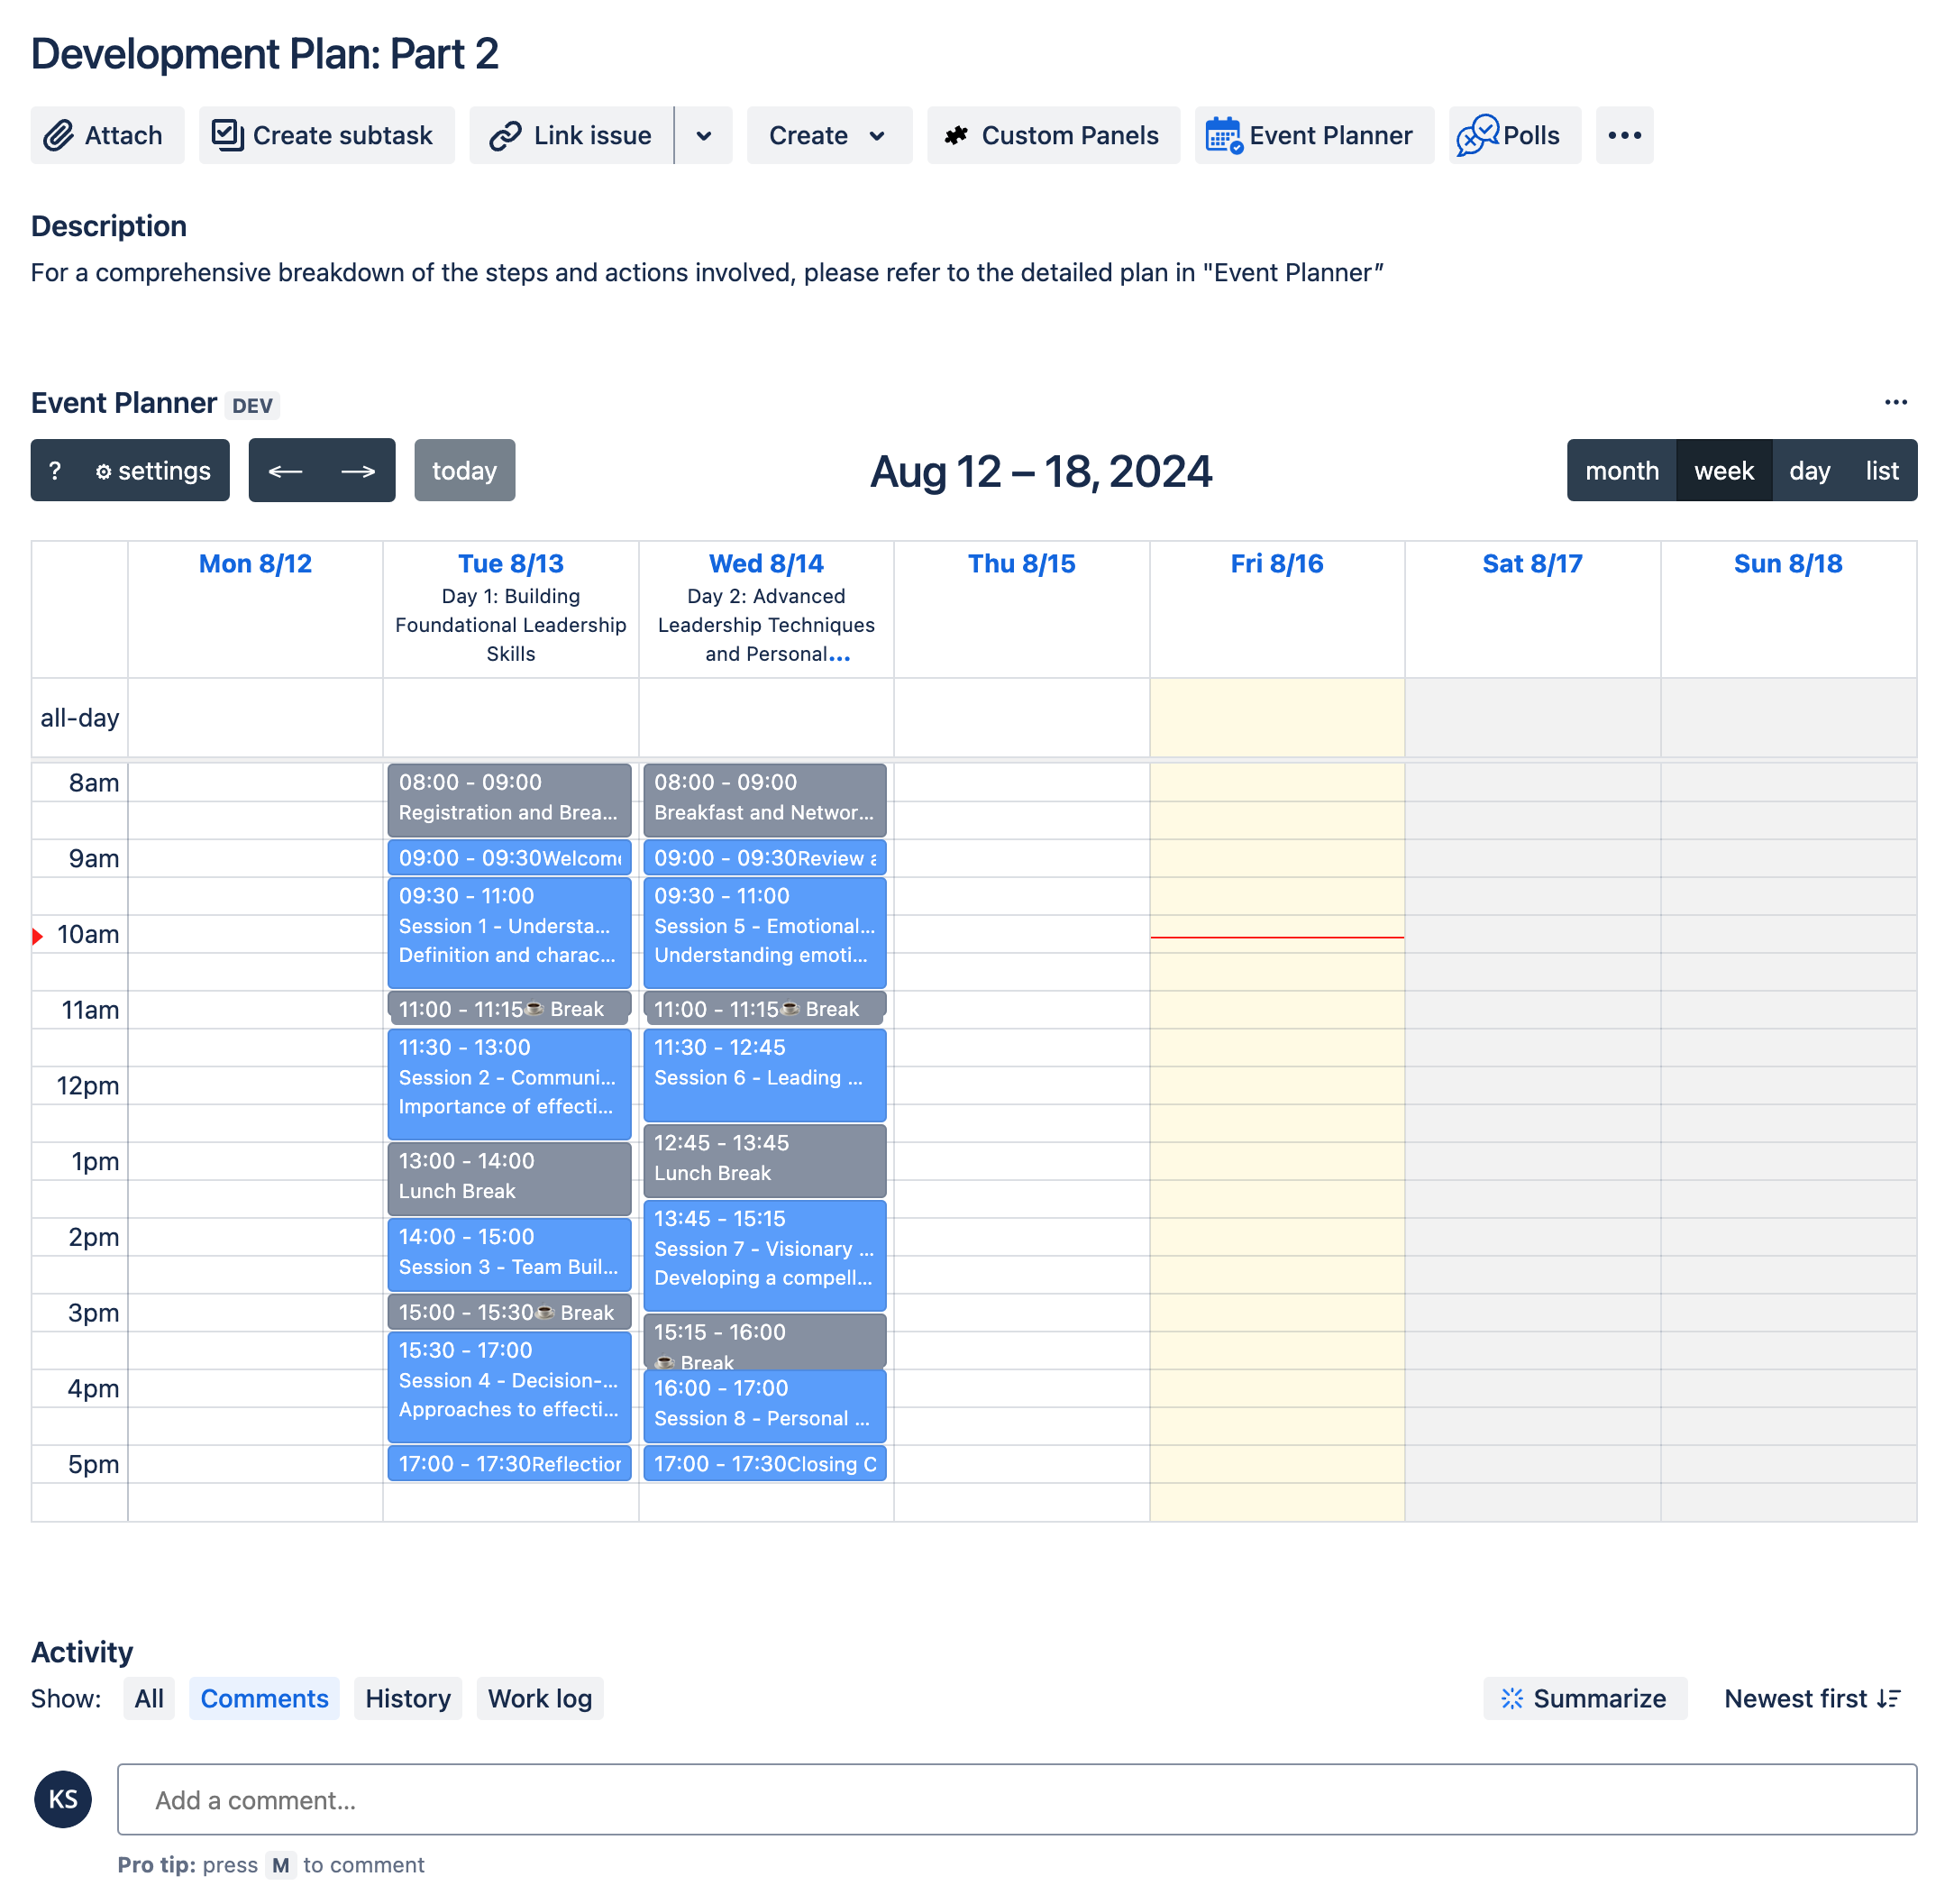
- Click + Add event or click directly on any date in the calendar.
- Fill in the event details:
- Title (required)
- Description (optional — supports plain text and links)
- Start date and End date
- Color for visual categorization
- Click Save. The event appears on the calendar immediately.
If the Event Planner panel is not visible on an issue, verify the app is installed and enabled. See Troubleshooting.
Dashboard Gadget — Quick Start
The Dashboard Gadget is a standalone event calendar that lives on a Jira Dashboard. Its events are fully independent from any issue panel.
- Open or create a Jira Dashboard.
- Click Edit dashboard → Add gadget.
- Search for Event Planner and add the gadget to your dashboard.
- Use the same event creation flow as the Issue Panel (steps 3–5 above).
Events created on a Dashboard Gadget are not associated with any Jira issue. Deleting an issue does not affect gadget events.
Key Features
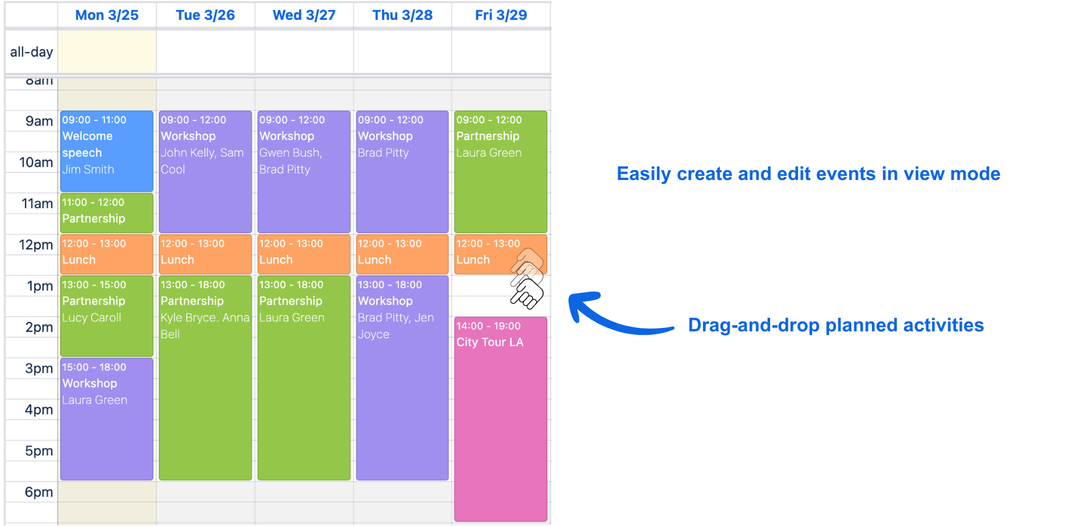
Drag-and-Drop Events
Move existing events by dragging and dropping them to a new date. Resize multi-day events by dragging their edges to change duration.
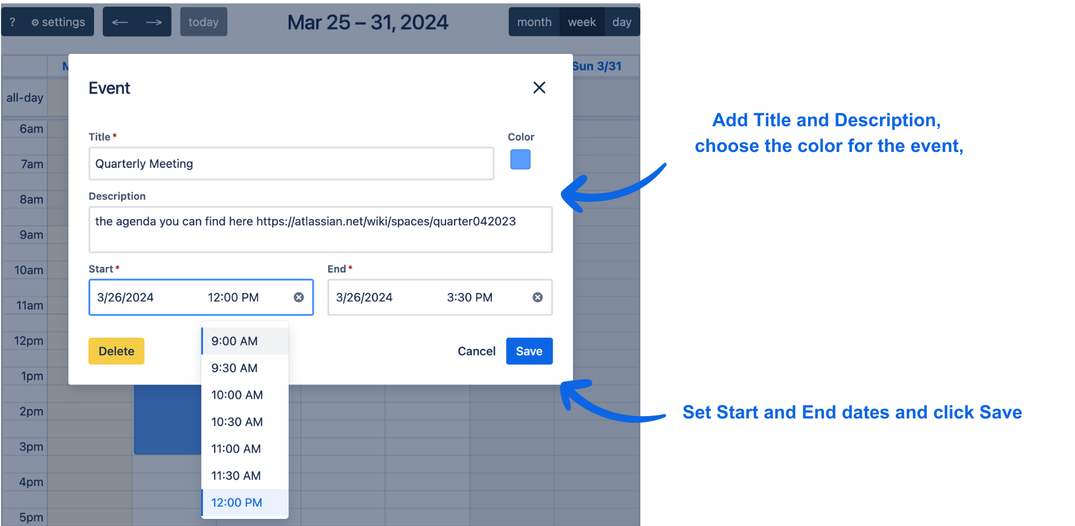
Event Creation Dialog
Click any date or the + Add event button to open the event editor. Available fields:
| Field | Required | Notes |
|---|---|---|
| Title | Yes | Displayed on the calendar tile |
| Description | No | Supports plain text; use this field for links |
| Start date | Yes | — |
| End date | Yes | Can equal start date for a single-day event |
| Color | No | Used for visual categorization |
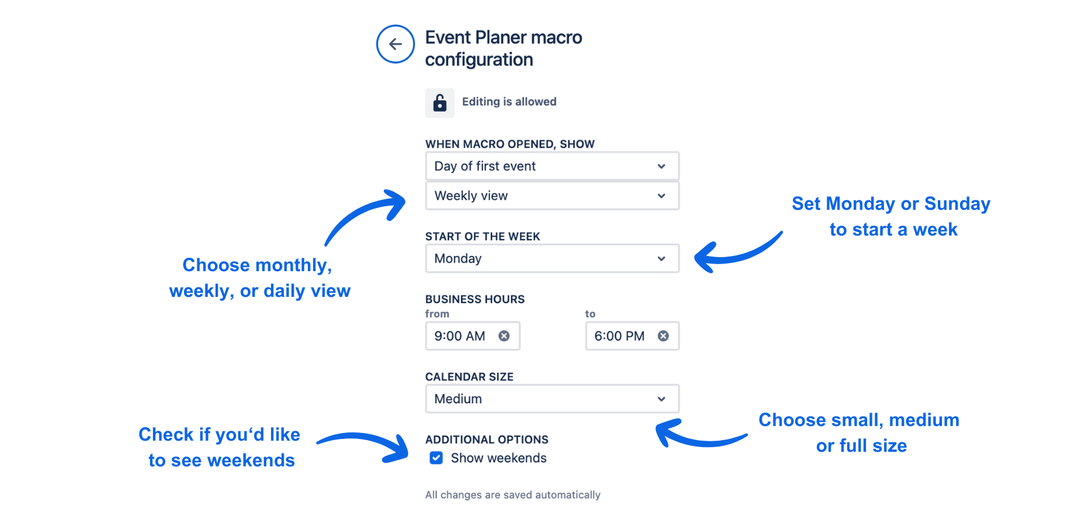
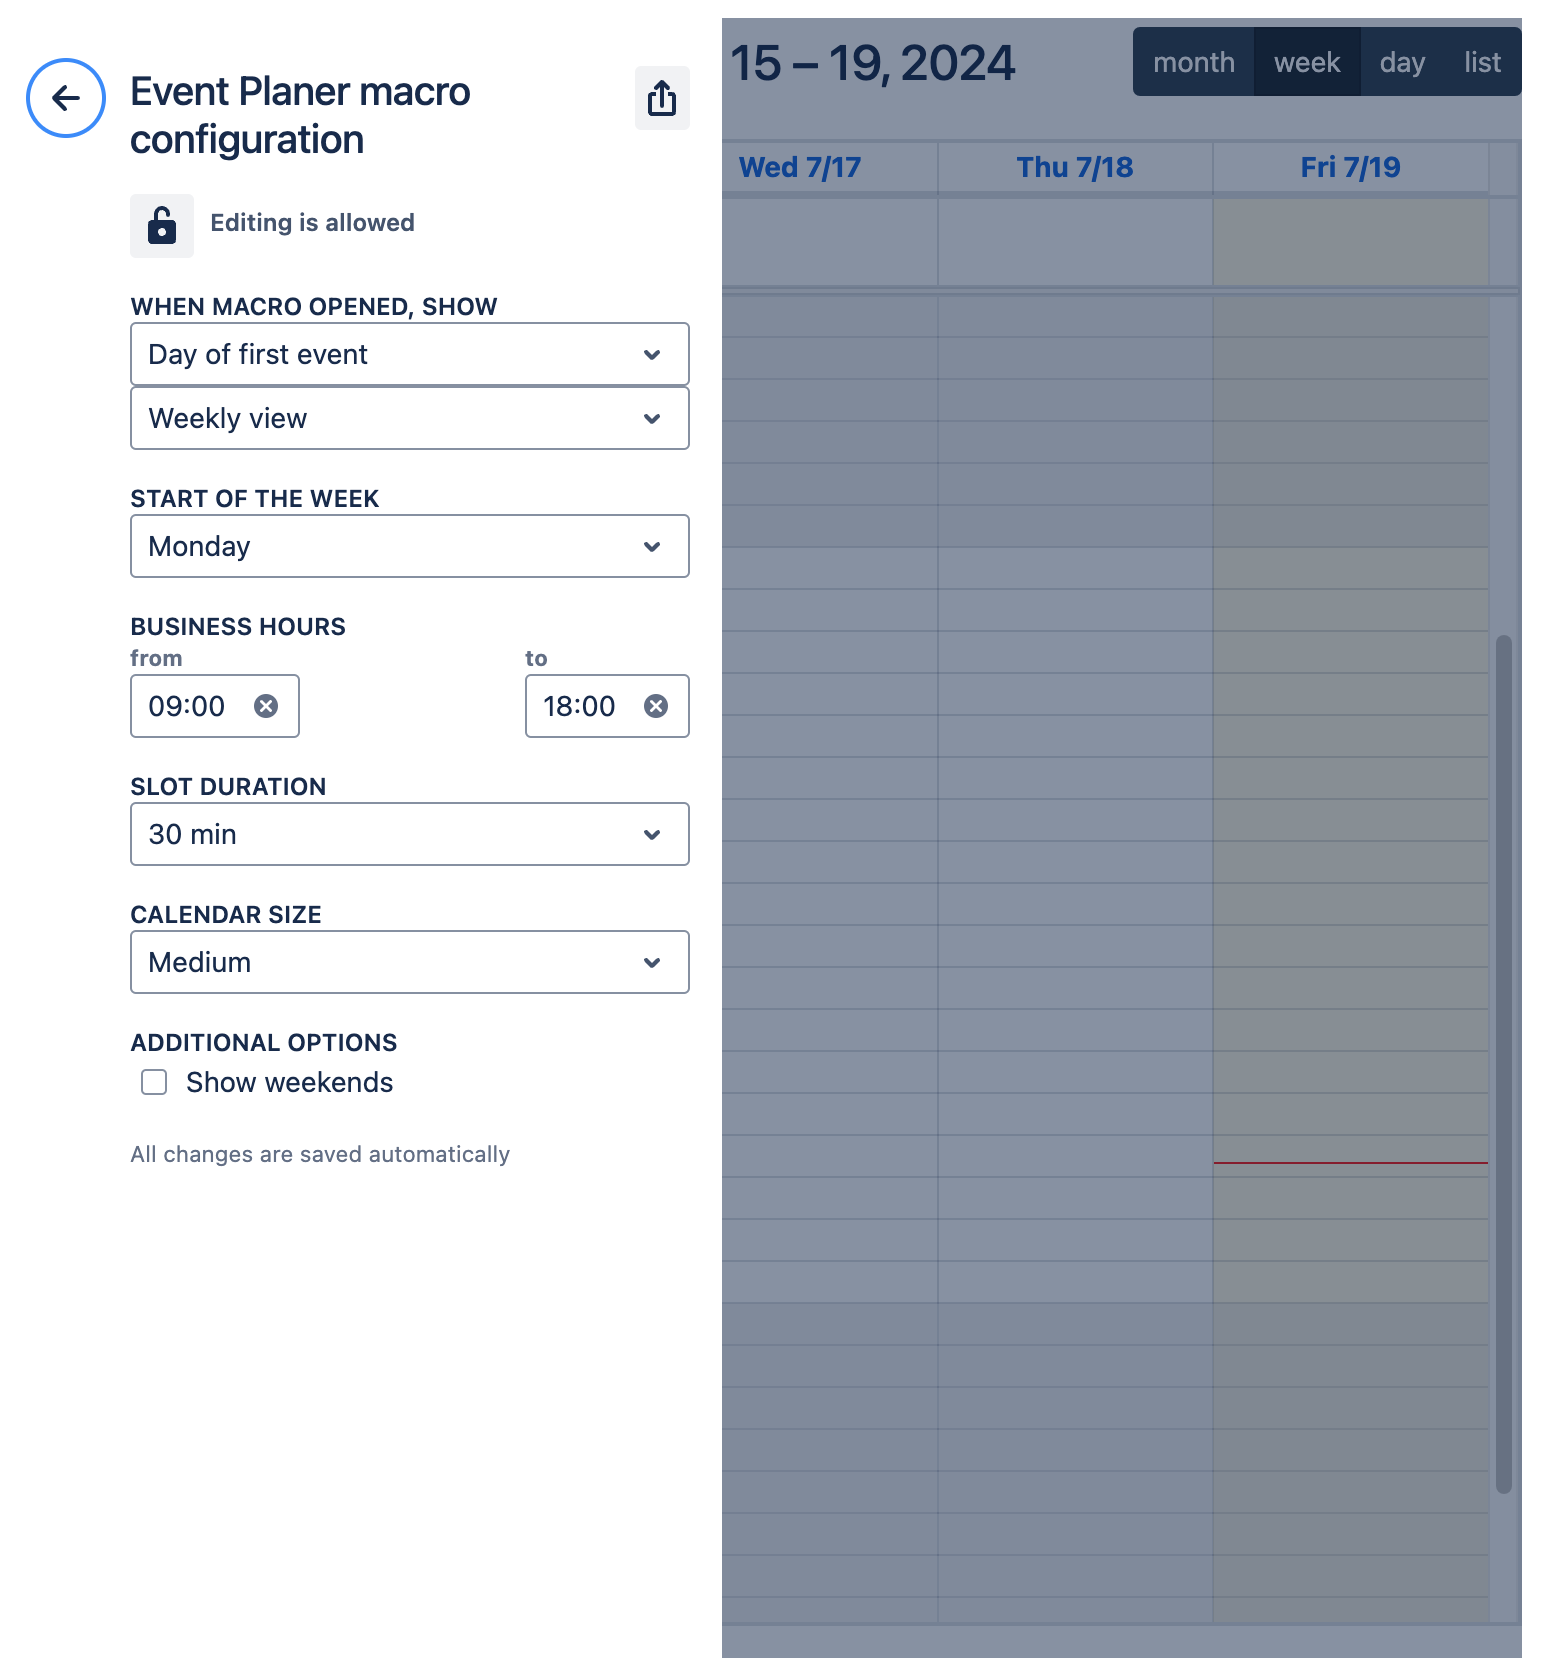
Configurable Calendar View
| Option | Description |
|---|---|
| Calendar size | Controls the display size of the panel or gadget |
| Default view | Choose between monthly, weekly, or daily view |
| Start of week | Set Monday or Sunday as the first day of the week |
| Weekend visibility | Show or hide Saturday and Sunday |
Color-Coded Events
Assign a color to each event during creation or editing. Colors are visible on calendar tiles and help teams distinguish event types at a glance.
Dark Theme
The app automatically adapts to Jira's dark theme when enabled.
Exporting Events
You can export calendar events to share with external calendar applications.
Supported formats:
- ICS — compatible with Apple Calendar, Google Calendar, and Microsoft Outlook
- CSV — compatible with spreadsheet tools
To export from an Issue Panel:
- Open the Jira issue containing the Event Planner panel.
- Open the panel Settings (gear icon or settings menu within the panel).
- Click the Export icon.
- Select the export format: ICS or CSV.
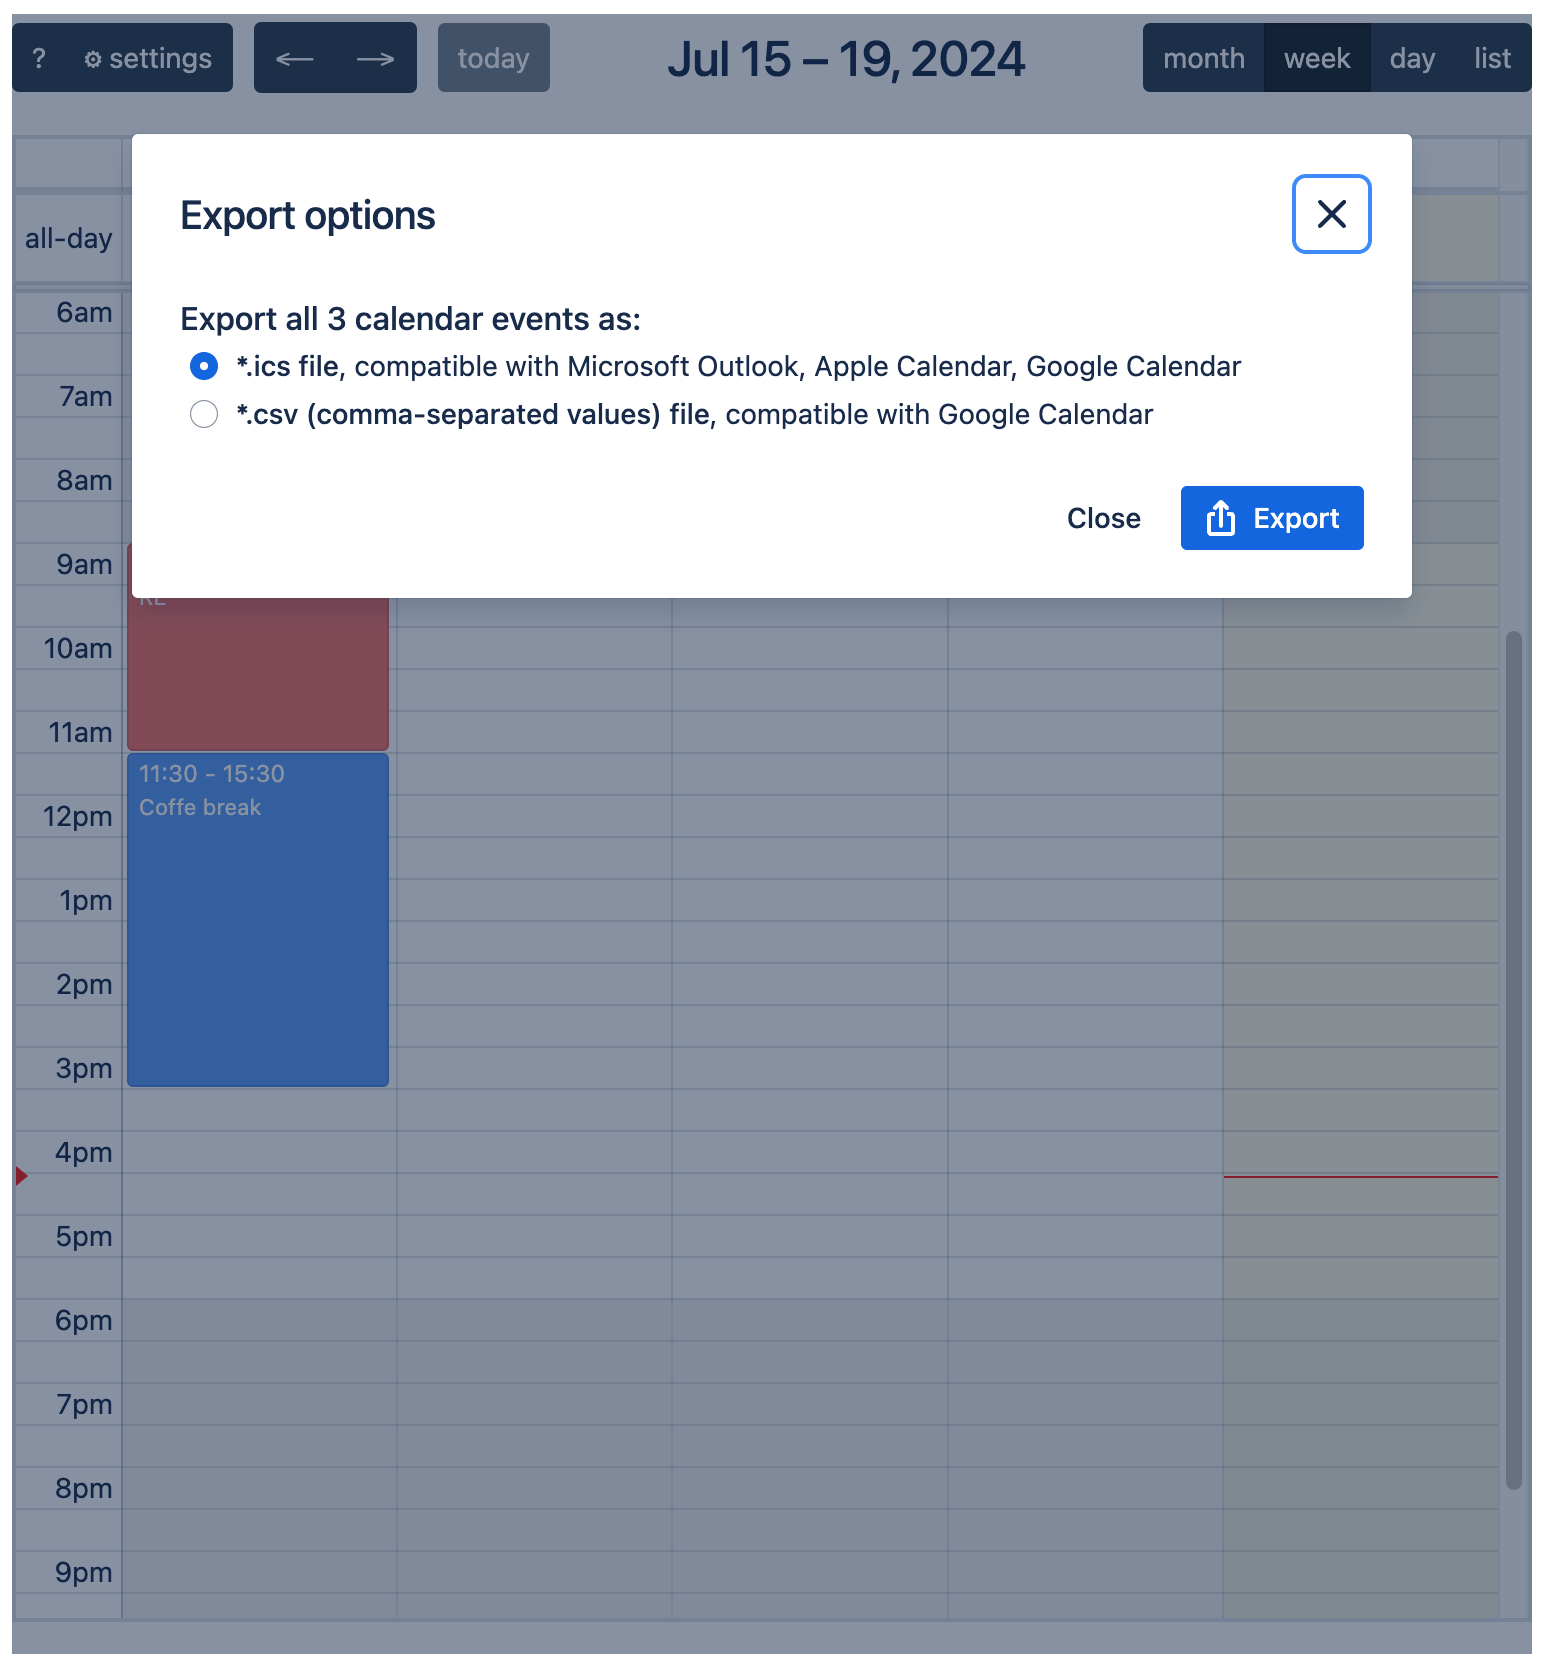
- The file downloads to your device.
The same steps apply to exporting from a Dashboard Gadget — open the gadget's Settings and click the Export icon.
Limitations
| Limitation | Details |
|---|---|
| Events scoped per issue | Issue Panel events belong to a single Jira issue and are not shared with or visible from other issues. |
| Issue Panel and Gadget are independent | Events in a Dashboard Gadget are separate from issue panels. There is no cross-panel event aggregation. |
| Cloud only | Requires Jira Cloud. Not compatible with Jira Data Center or Server. |
| Recurring events | Not currently supported. Planned for a future release. |
| Event fields | Events support Title, Description, Start date, End date, and Color only. Custom fields are not available. |
Data & Privacy
- Built with Atlassian Forge. All event data is stored within your Atlassian Cloud instance. No data is transmitted to or stored on Apportunity UG (haftungsbeschränkt) servers.
- Issue Panel events are stored within the scope of their Jira issue. Deleting the issue permanently removes all associated events.
- The app operates entirely within Atlassian's Forge sandbox and complies with Atlassian's cloud security requirements.
- For the full privacy policy, see apportunity.xyz/privacy-policy.
Need help? Visit the support portal or see Troubleshooting & FAQ.